Exhibition Set Up: Finishes Touches

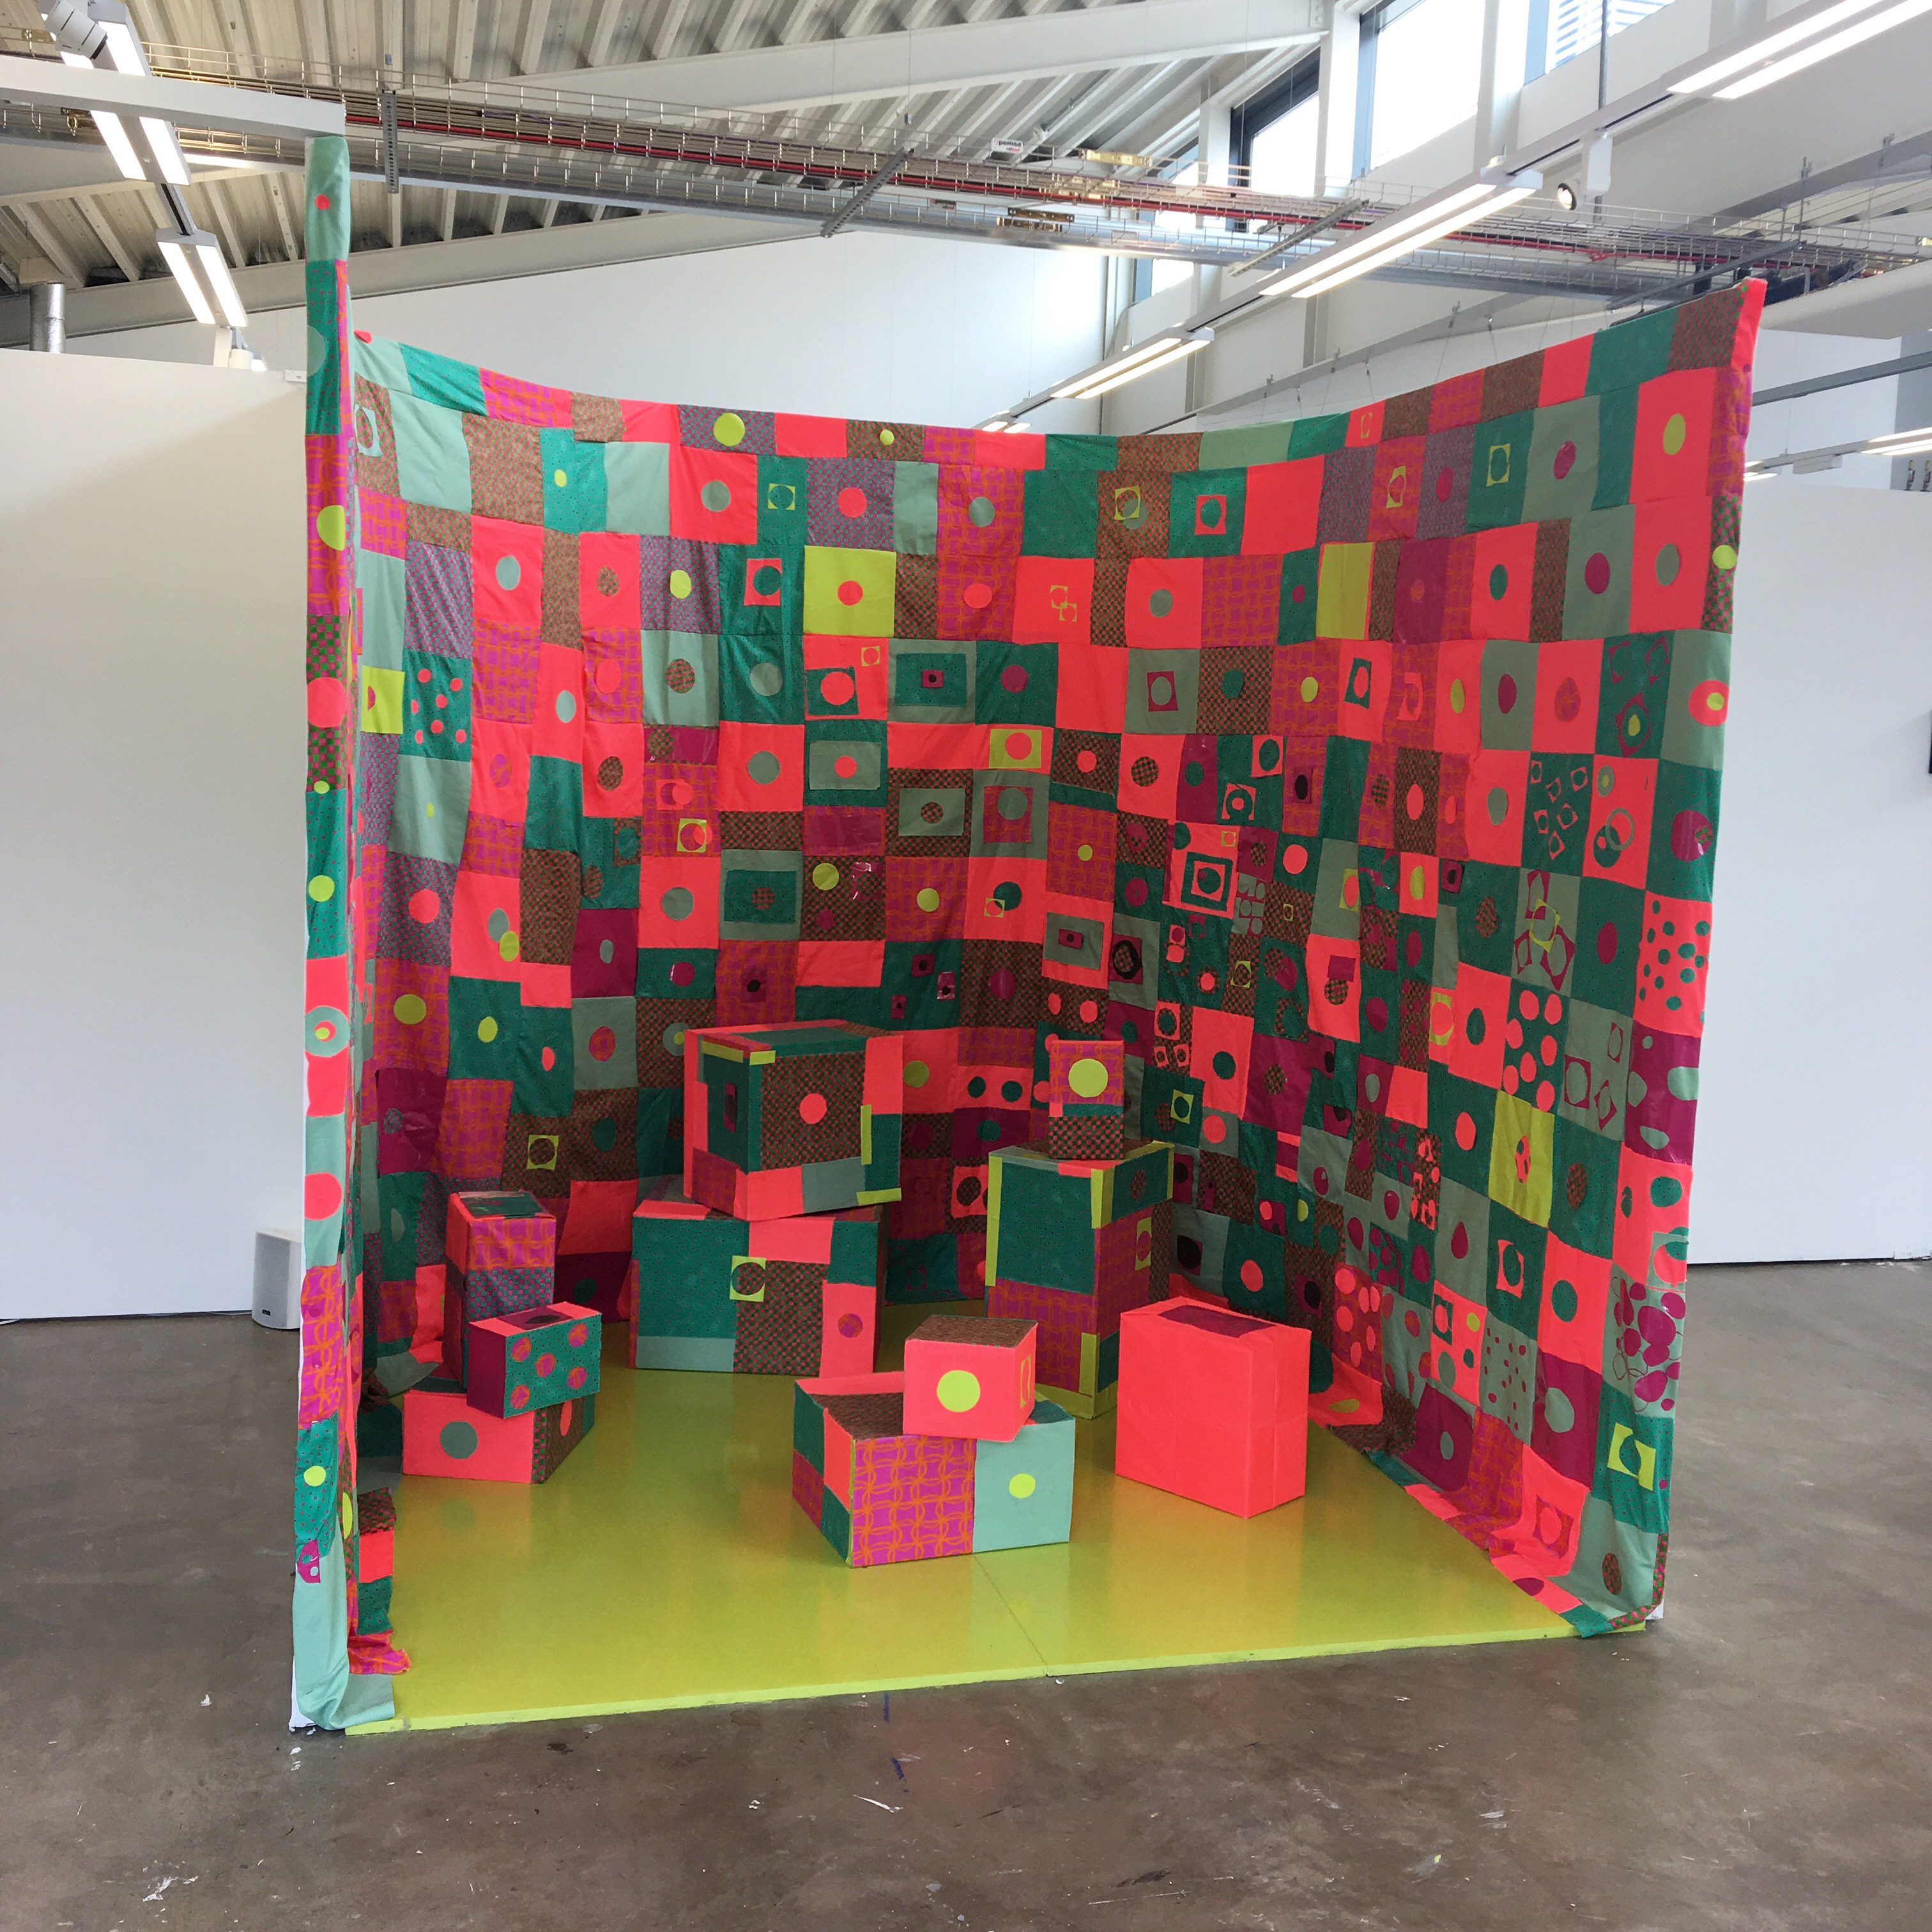
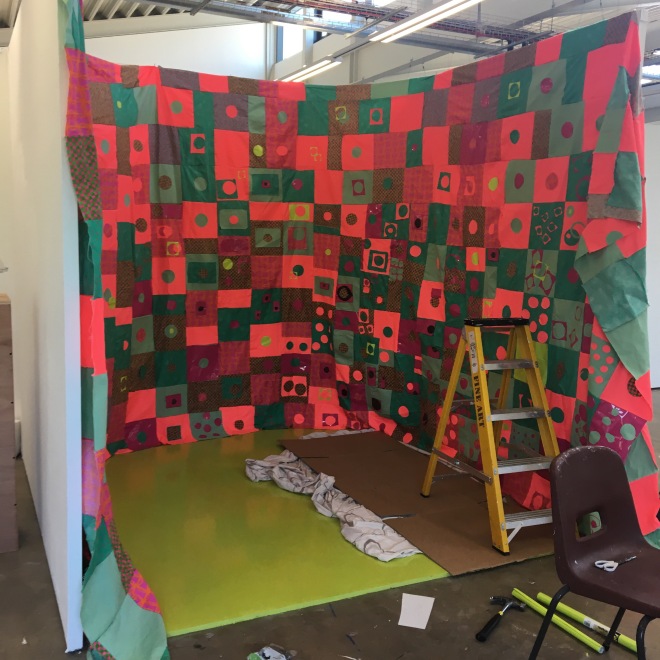
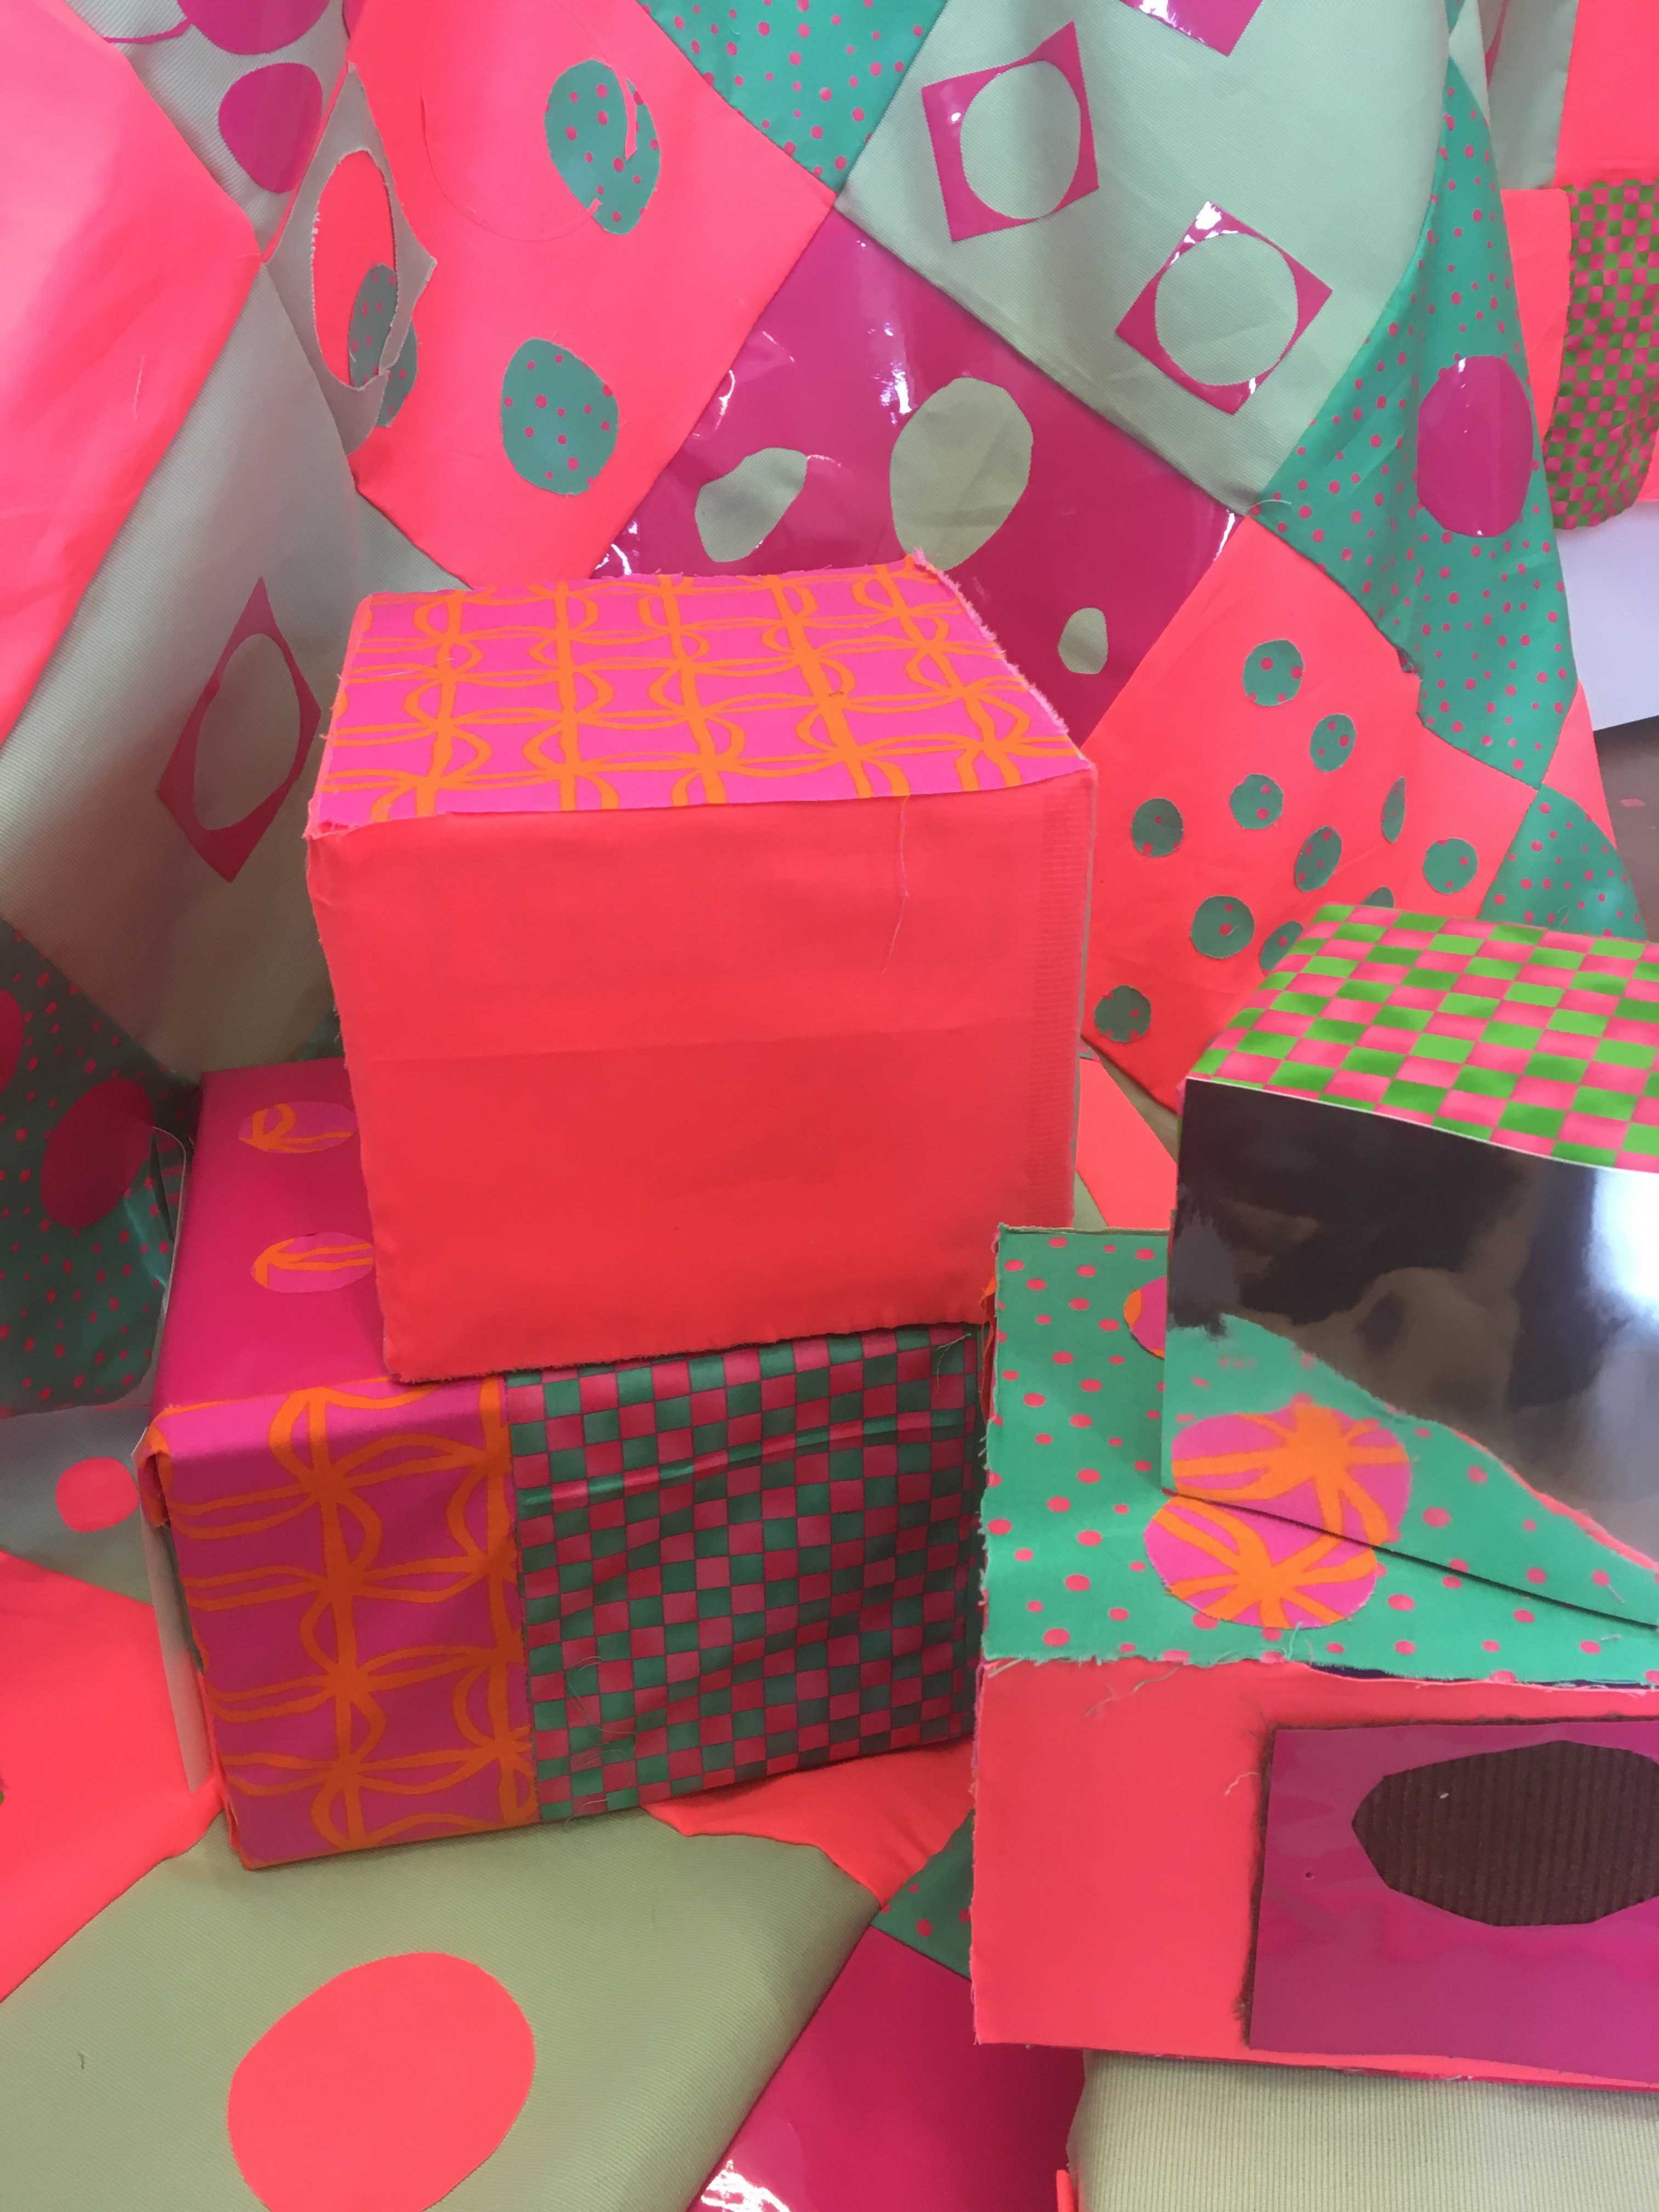
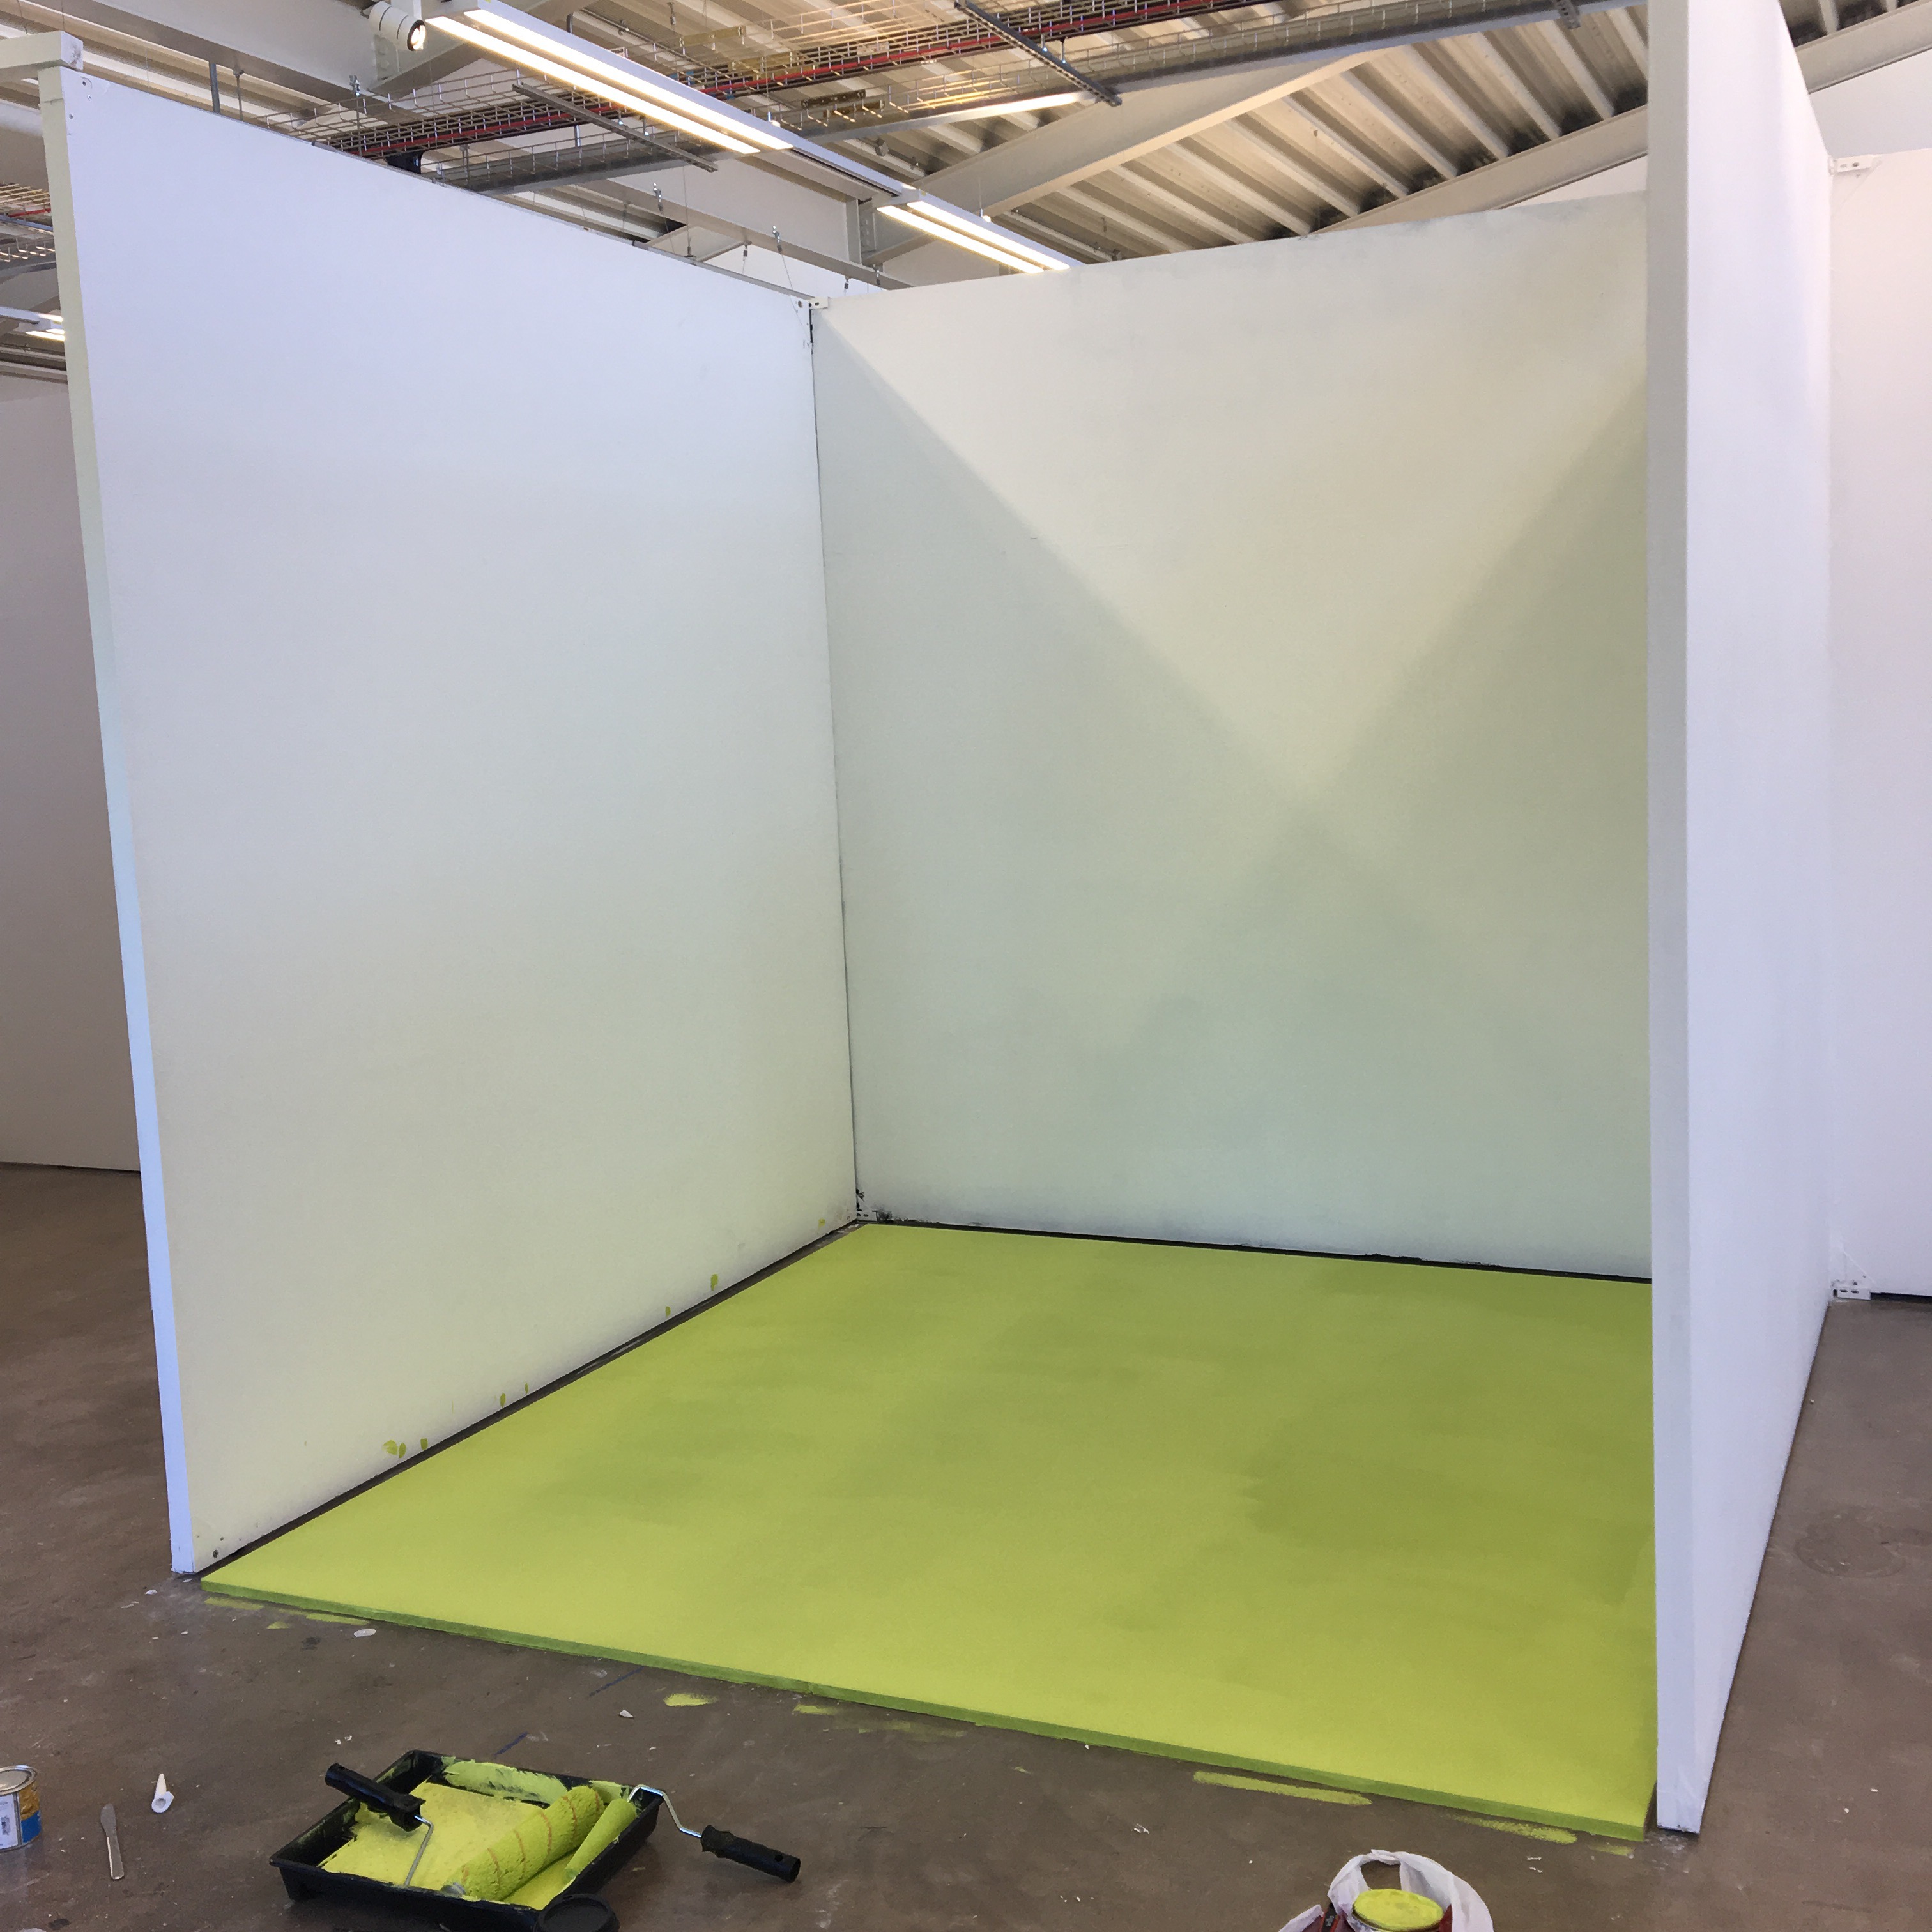
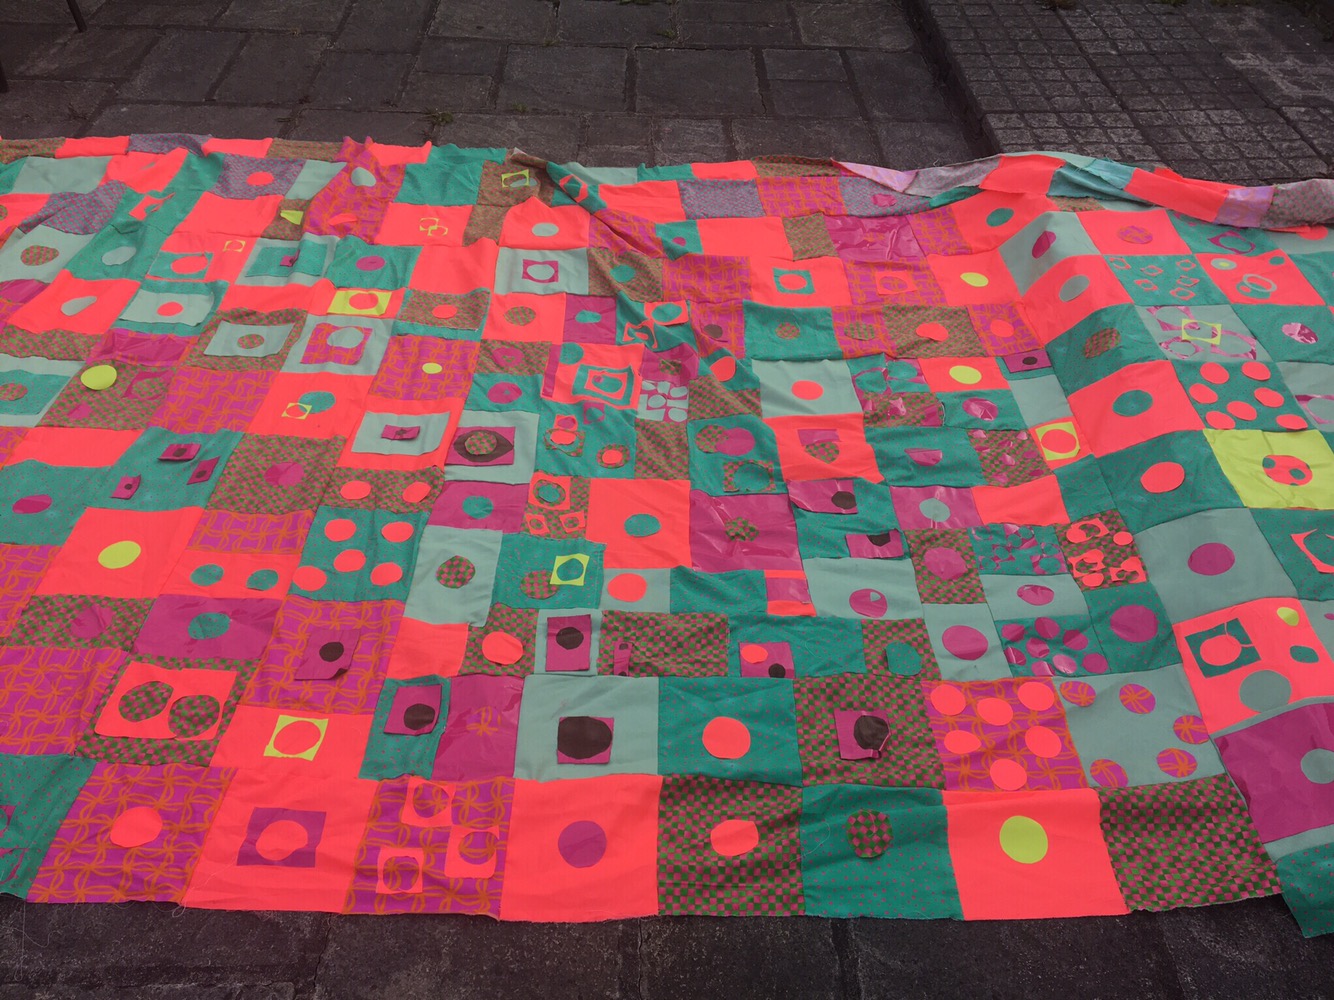
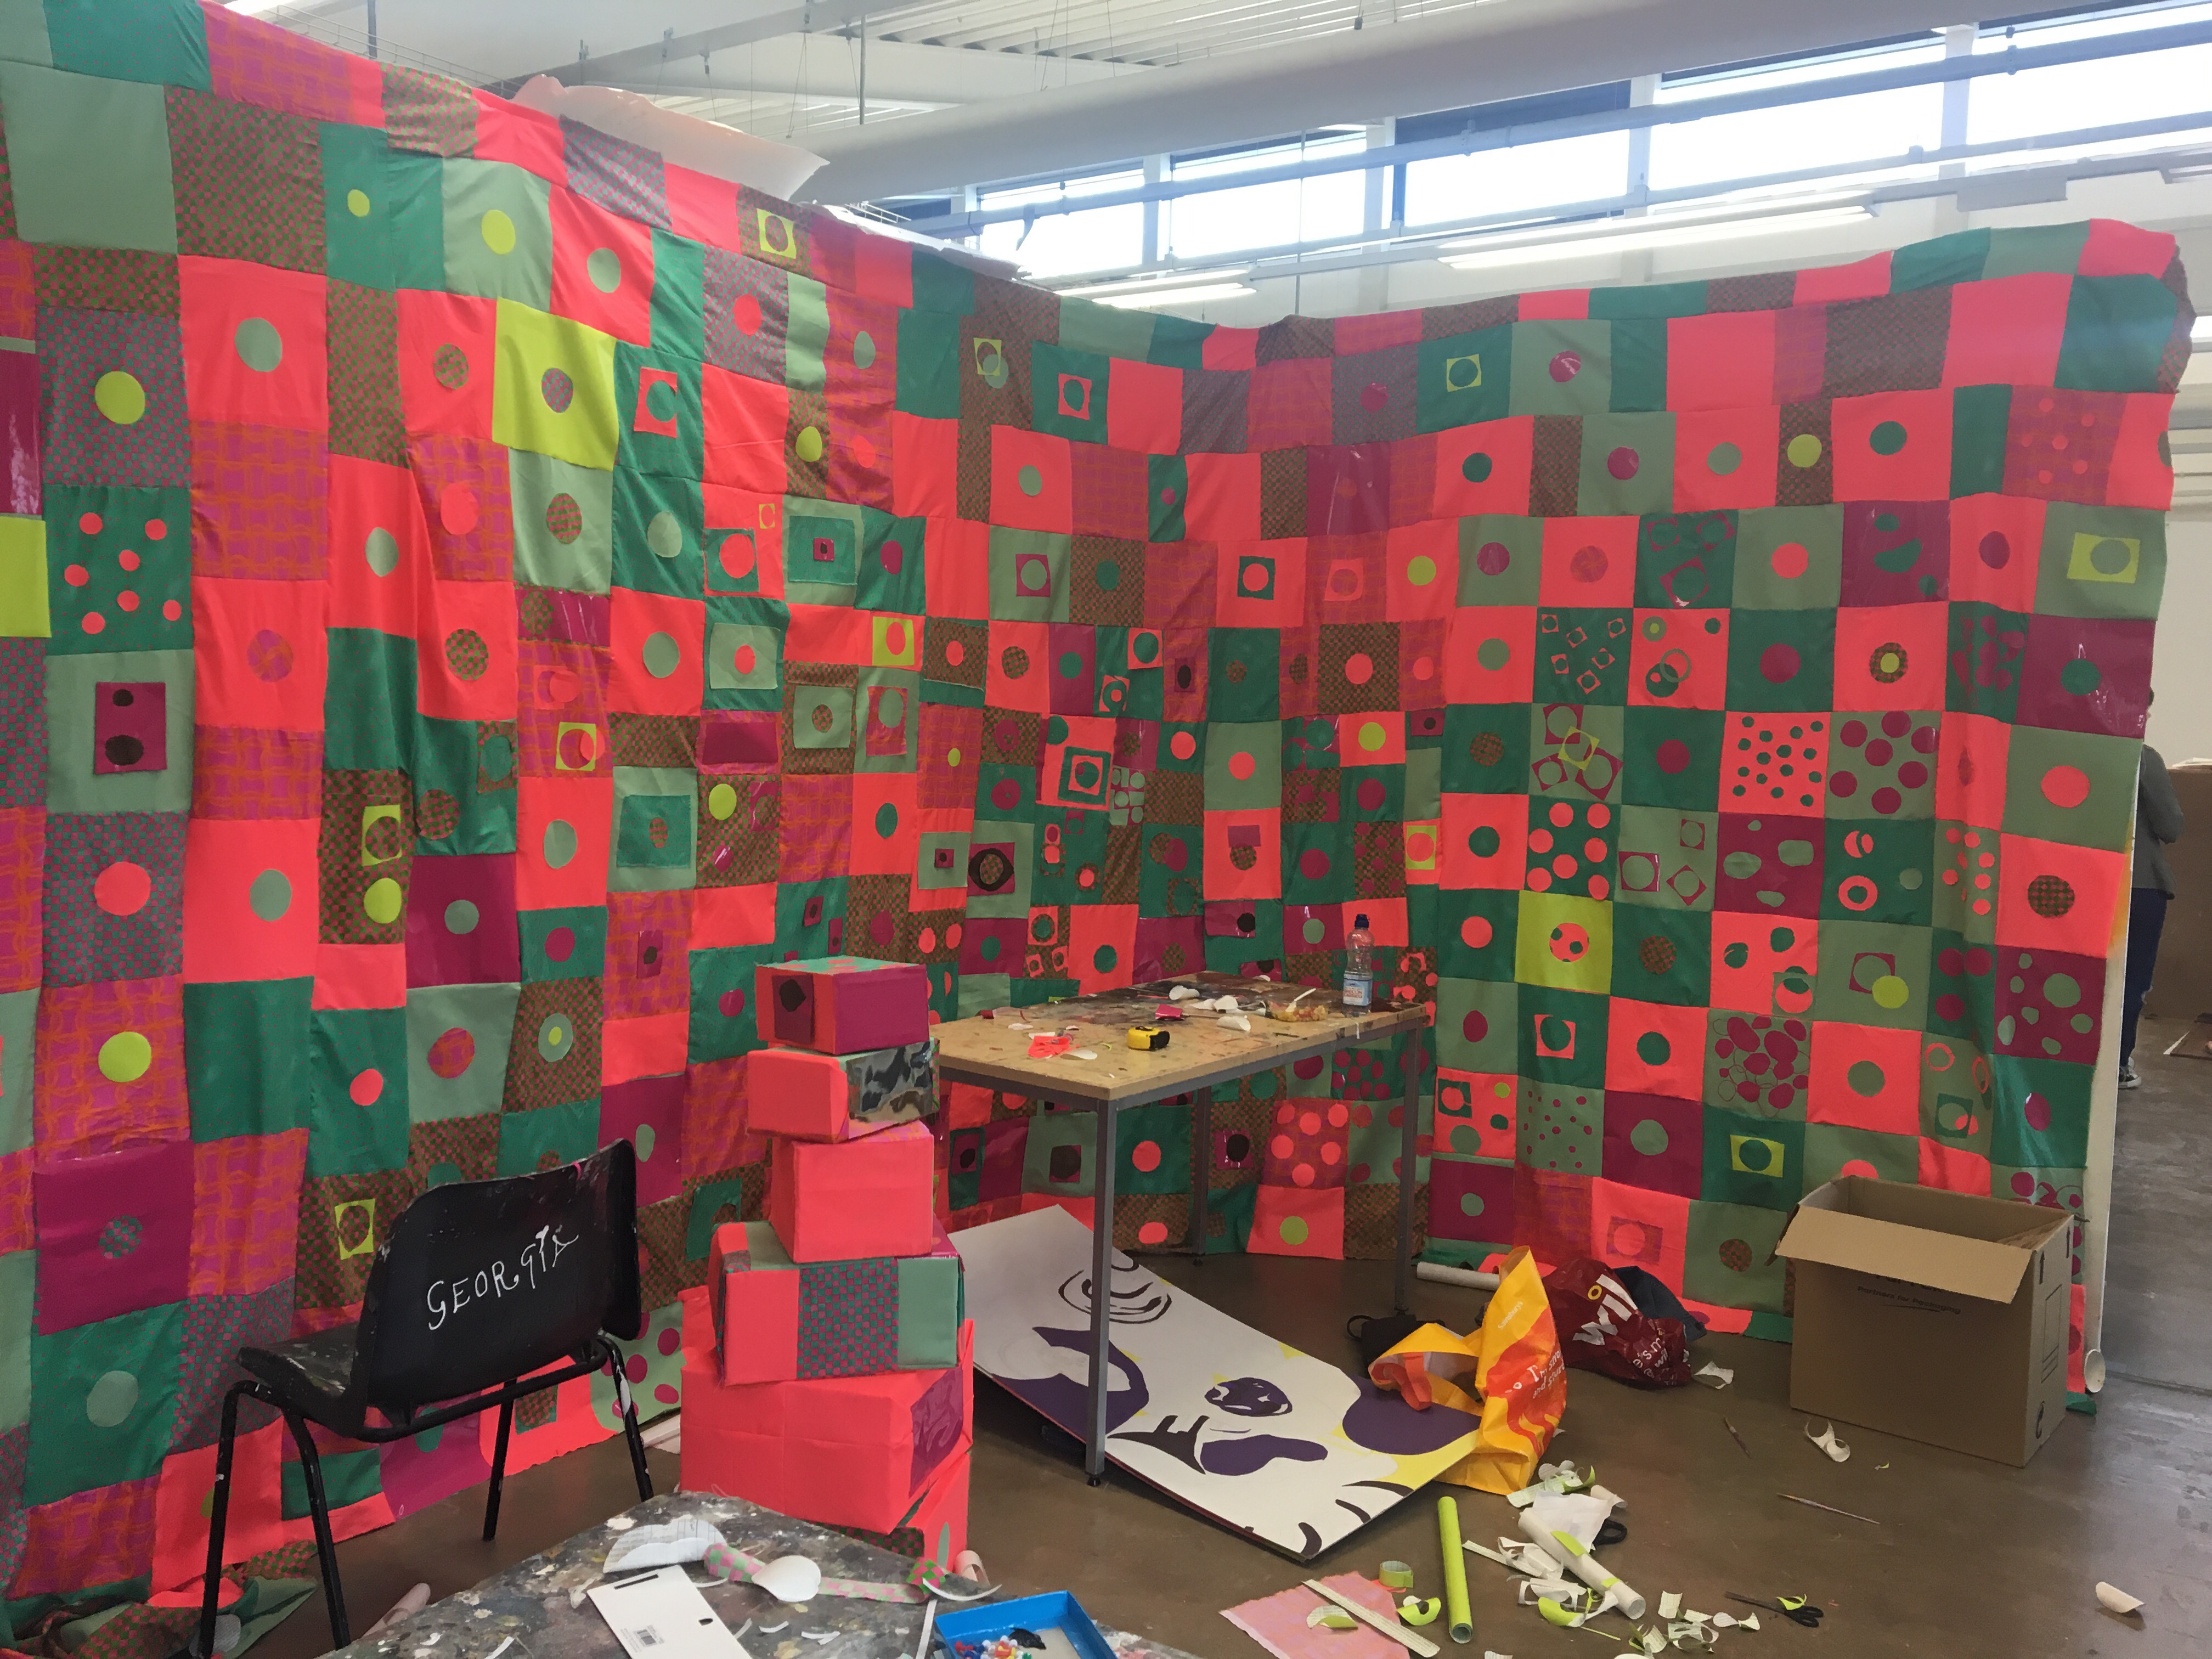
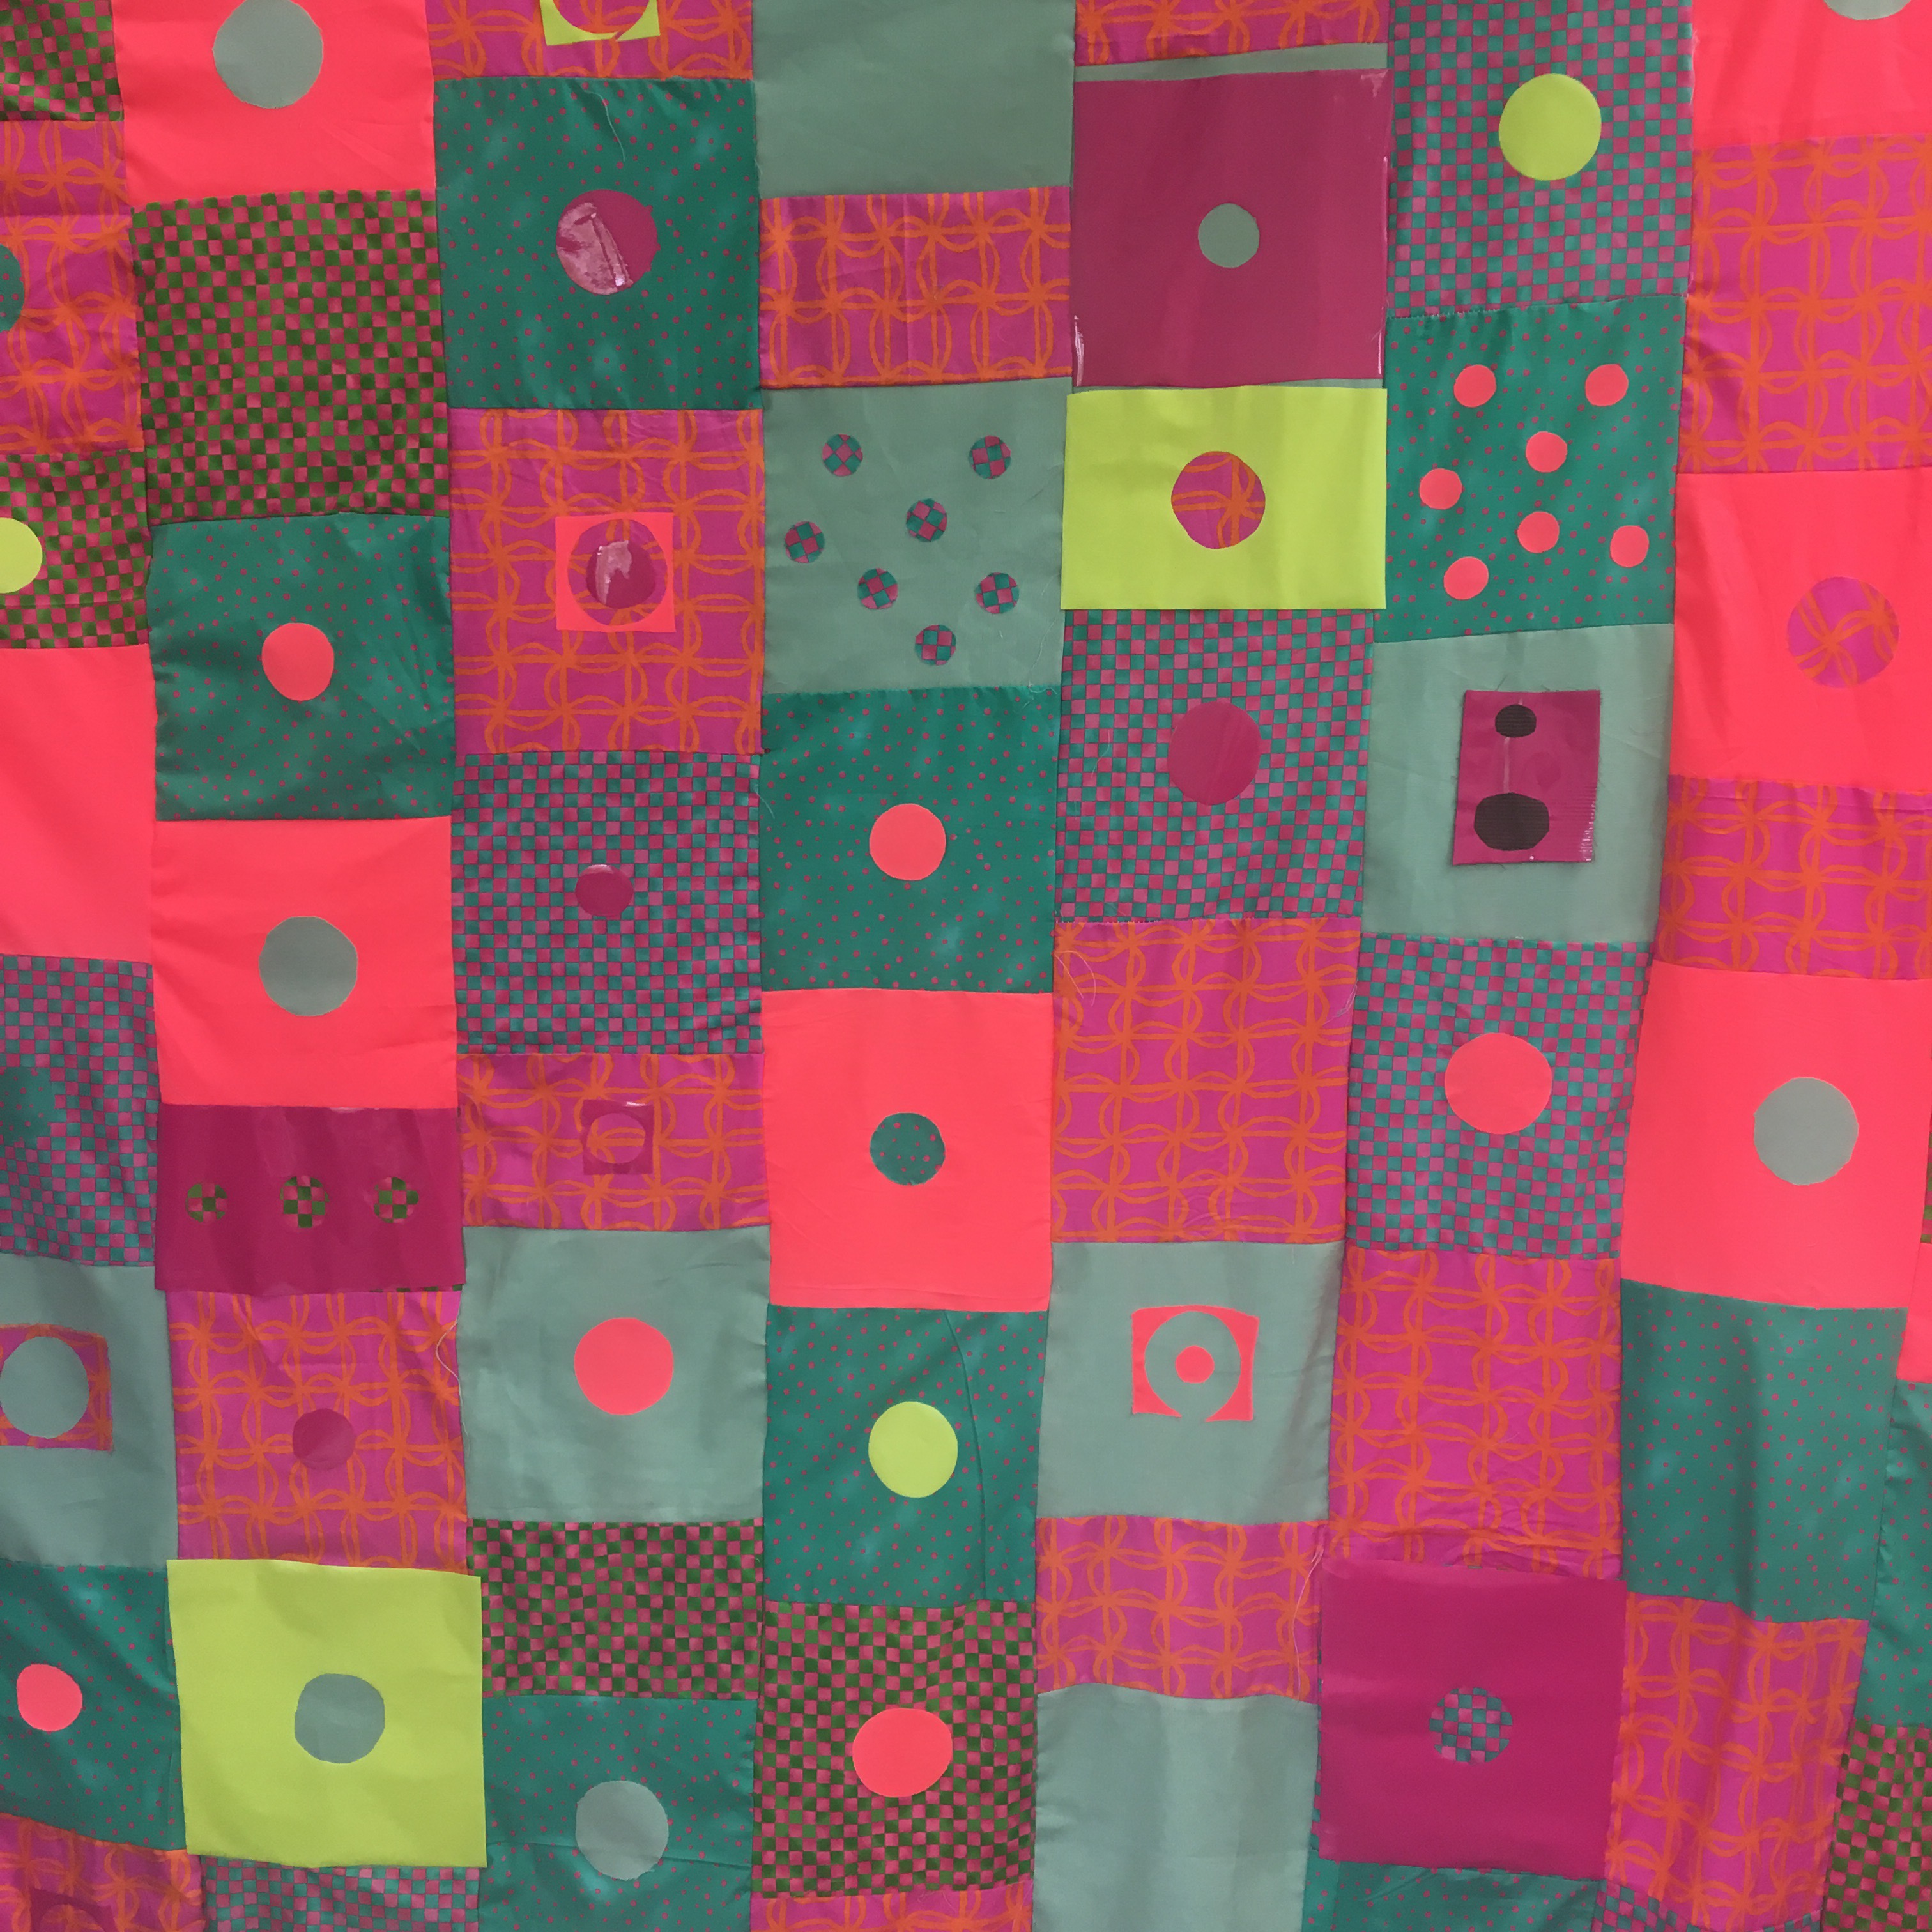
My installation is complete. Today I finished the final touches of positioning my boxes and adding fablon to any of the patchwork squares that I felt were looking bare. I have mixed emotions about finishing this piece of work as this is my last piece of work being a student as CSAD. I am very pleased with how the installation looks, it shows the strong relationship certain colours have together and how colours can play tricks on peoples vision. The installation is also overpowering and intense, it also creates a feeling of uncomfortableness if you look at it for long, due to the intrusive colour and patterns that have been used. I definitely feel that a viewer would look at the boxes and the surrounding patchwork and make connections to repeated patterns and use of colours that I have chosen.  Even thought there were elements to the piece that I have changed through set up, I don’t feel that the installation is missing anything. The ceiling or curtain was never something I felt I really needed as my intentions were never meant to make a ‘room’ shaped installation as light and colour are the many priorities of this installation.

After being in my space I have heard many responses to my work that have interested me. Many being about the brightness of the piece and how they could see the colour reflecting from down the corridor of the studio. This wouldn’t have happened if I had closed off the installation with a curtain so I am happy that I decided against that. Another comment I had that interested me was ‘So the boxes are falling from the patchwork’ I had never thought of my work this way. The boxes were made to show a 3D version of some of the shapes reflected in the patchwork, but never had I thought about looking at it as if there are objects visually coming from the wall.

Exhibition Set Up: Setting up the boxes 

Today I began to set up my centre piece boxes. My intentions have always been to stack the boxes on top of each other to the height of the walls in centre of the floor. Although, when I piled to boxes, I felt it changed the look of my piece as the stack of boxes took over everything else. I didn’t want the boxes to be the main focus more like an additional part of my installation piece. After trial and error of moving my boxes to different places and heights I finally settled on a more scattered approach. I also decided to pile some of the boxes and left some as individual pieces. I am much happier with this as I feel it contributes to my patchwork surrounding and shows the relationship between the patchwork and the 3D pieces. It also gives my installation the hectic intense aesthetic that I intended to make.img_3576


Exhibition Set Up: Patchwork

After waiting a day for the gloss to dry on my floor I was able to start hanging my patchwork up. I was apprehensive about this as I wasn’t sure how it would look in an enclosed space as I am so used to having it fully stretched out across 3 walls. To begin with I nailed it temporally to the walls to get an idea of the shape I wanted as I was certain that I didn’t want the patchwork to follow the natural shape of the walls as this could make the piece look  like a wallpaper. Which isn’t the aesthetic I was going for. I made sure the fabric curved around the edges forming a rounded space. I felt this way I was able to manipulate the fabric into creating its own space, rather than following an already formed structure. Once I was happy with the shape I then staple gunned the fabric to the top of the walls making sure nothing hung over anyone else’s space.

Something I found a struggle were the edges of the fabric. I had a lot of excess fabric hanging over the entrance of my space that I didn’t want. I decided to cut this even though I was sceptical due to the amount of work I put into each patch but I am considering using the excess in frames for the degree show or to develop any patches that are looking bare. To neaten up the sides I then made sure the fabric was folded and then stapled. I will be covering the evidence of any staples with fabric circles or fablon. I will also need to add fablon to numerous squares on the patchwork as many fell off when manoeuvring.

Overall I am pleased with the way this is looking so far, I also feel that it sits well with the luminous green floor.

img_3556img_3560

Exhibition Set Up: Alterations 

I began to set up my ‘ceiling’ today and I instantly disliked it. I felt that it changed the overall brightness of the piece. As the light is a main element to my work, due to it making the colour is as intense as I want it to be. I don’t want to put something on top of my work that is going to take away the saturation of the colours in the patchwork. I also felt the tone of pink in the mesh wasn’t the neon tone that I wanted and added nothing to my piece as an overall.

Therefore I have decided on not using a ceiling for my piece. I don’t feel this is a loss as the colour pay off to me is more important than making the installation into a closed room.

img_3580

Using Mirrors

Using mirrors in my work has been something I have been contemplating since I started planning my installation. As I felt that it would be a good way to cause more illusions and a way to create a extra dimensions to the patchwork. But after trialling with paper mirrors I am finding it difficult to attach them to the fabric without them falling off or becoming crinkled when the surface. Using fabric glue has been the best way to attach them but after seeing  the mirrors on the boxes next to the patchwork surrounding I feel that the boxes don’t actually need it due to the reflective flooring and fablon patches that are also reflective. Although I have kept 3 mirrors scattered on a few of the boxes as I felt these were areas that needed extra reflection and it was also a way to reflect light onto my piece.

Exhibition set up: Painting the foor 

Today I had my MDF cut ready to put in my space and use as my floor. As soon as this was cut I hit a few minor hurdles, I was unable to find a trolley that could fit such huge pieces of MDF on (most of them were already in use.) So this delayed my day, as I wanted to start painting early to ensure I was able to do as many coats as I needed, including the drying time etc. After finally having a trolley I brought my MDF to my space and placed it on the floor, when I suddenly realised that the boards weren’t level and when put together they left an obvious line of separation. I was initially going to tape this line but after speaking to Laura and other tutors, I was told this would rip easily if someone were to stand on my floor. I was also told that poly-filler would be no good as it would most likely crack especially with any movement to the boards. Eventually I decided to use flexi filler (silicone) to fill this gap. This at first worked perfectly.

I then began to paint my floor ‘luminous lime.’ As soon as I put this on the boards I was happy with my choice of colour as it was the perfect sickly neon green shade that I wanted to enhance my patchwork surrounding. The boards needed around 3 coats of paint to be fully saturated and opaque. If I had taken time to think about the floor longer I would have probably painted it white to start with the save myself having to use so many coats of green. But I am still happy with the overall pay off of the colour. Once the third layer of emulsion dried I began to varnish the floor. Instantly this gave my floor an extra element and really reflected the light like I wanted. Only issue was that the varnish took 16-20 hours to dry between layers so I was unable to do the next coat until the day later. After finishing the vanish I was happy with the finish of the floor, although the line separating the pieces of MDF has become visible again after the coats of paint, I am hoping to fill this in or make sure my centre piece is covering any obvious cracks. Although I am aware that some things just cant be helped and there will be parts I am not 100% happy with.

Overall I am very pleased with the outcome of the floor even if it did take more time than expected. I definitely feel that it is going to add to the all round installation.

Exhibition Planning: Changes to my space

Now that my actual work is finished I have been thinking about how I want my installation space to look. I have been contemplating whether to close my space with a curtain or patchwork so that you can actually go in and experience the space. Although after seeing my space I feel that I would completely lose the lighting if I were to close off the space, as I am in front of a window I don’t want to lose the natural lighting. The lighting is an important part of my space as I feel that the colours and contrasts in the fabric are really enhanced when hit by light especially natural light. Also I feel that the patchwork is rather impacting illusion-ally from a distance as well as close up and if I were to close the space up the colours wouldn’t be seen from afar.

My work in natural light.

Degree Show Build-Day 2/3

My space is officially ready for set up on Monday. As I am covering the walls I didn’t have much to do in regards to prepping my walls, other than one black wall that I had. This was kindly painted over with help from a group of first years. So for the rest of studio set up week I have been helping others fill, sand and paint their walls in preparation for the show. The studio is looking a lot more like a gallery/ exhibition space now and I am happy and ready to start seeing other students work as well my own.

I was also lucky enough to find some spot lights to face onto my studio space to help brighten my piece overall. As I had no beams above my space, I have put them either side and angled the light so that they bounce at the walls in the same place. I am hoping this will help make the colours on my installation extra vibrant.

Studio set up: Day 1

Degree Show Build started today and ask expected it was extremely hectic. To begin with we cleared out any work that had been left in the studio, then we moved chairs and tables to storage spaces. We then began dismantling the walls and putting them up in the spaces set out for the exhibition. This was done surprisingly quickly.

Now that I have seen my space set up it is starting to feel real. I am happy with the space I have been given, it is the shape I wanted and it is in the lighter side of the studio as it is near windows. Although I would have preferred to be directly in front of a window, I understand that there is a lot of people who have asked for this as a request. I am hoping to brighten up my space with spot lights to help my work look as bright as possible.

I have been given a black wall as I am covering my space with fabric therefore the condition and colour of the paint isn’t an issue I need to worry about. Although I feel I should paint at least one layer of white emulsion over the white just so that the black doesn’t darken the look of the fabric.